Creating 3D looking Text
Lab Activity: Using GIMP to create 3-dimensional text logo
Module - Fundamentals of Digital Imaging
Overview
In this activity, students will learn basic operations that are
needed in many applications: Generate isolated parts of a picture and
combine them with a random background. What we want to achieve in this
lab is to generate a 3-dimensional text logo flying (and movable) over
the background (a simple uni-color layer in our case, but you will
easily see that you could use any other (stack of) layers/images
instead.
Learning Outcomes
Upon completion of this activity, the student will know how to:
- . Understand what are layers
- . Know how to manipulate multiple layers
- . Know how to blur images and how to adjust opacity of different layers
- . Know how to merge layers
- . Understand layer mask and its applications
- . Know how to export individual images using GIMP
Key Terms/Skills/Concepts
GIMP, layers, blur, opacity, layer mask
Detailed Description
- Start GIMP and create a plain image of size 600 × 300 with color white filled in.
- Set the foreground color to be black and white to be the background color

- Use the text tool to add some text (Your last name) . Make your
text nice and big enough by properly changing its size and font. You
will get a new text layer which you can also see if you look at the
layers dialog. You can use the move tool to move the text where you like
to have it.
- Then merge your text layer with the white layer below by
choosing Layer -->Merge Down. You should now have one layer with
black text on white background. Name this layer Text.
- Using Colors → Invert , you will achieve something like the picture below.

- Blur the image a bit using Filters → Blur → Gaussian Blur (a value of 6 for the blur radius may be a good start).
- Add a new layer to the image with the help of the New Layer
button in the layers dialog. In the New Layer Dialog, Choose Layer Fill
Type to be white. Name the new layer Plasma .
At the end, leave the new Plasma layer visible and active.
- Use Filters → Render → Noise → Plasma (Yes, you are invited to
experiment with the parameters...) to make this layer a little
colorful. The layer dialog should look something like this now:
- Make sure the Plasma layer is the active layer and follow menu
Filters → Map→ Bump Map and use the blurred Text layer as your choice for the Aux Input
in the popup dialog.
You may need to increase the Depth to 10 or other values so that you can see your name clearly in the plasma.
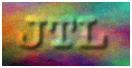
Your bump map should look like the one here:
- Make sure the Plasma layer is the active layer and choose
Layers →Mask → Add Layer Mask from the menu. Choose the mask to be
white. Nothing will change on the image for now, but the layer dialog
will look like this:

- Now activate the Text layer again (you don't have to make the
layers on top to work on this layer. It's enough that you activate it in
the layers dialog by clicking on it). Now do Edit → Copy.
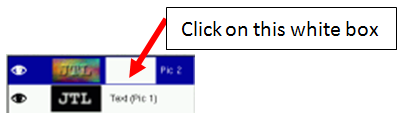
- Make sure you have the mask of the top layer selected by clicking on the mask, not on the Plasma preview, but the white box.
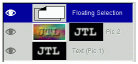
- Choose Edit → Paste. You will again get a floating selection, shown in the layer dialog like this:
- Use the layer dialog menu to Anchor Layer, which will anchor
the floating selection into the previous activated layer (which is the
mask of the plasma layer in our case). Now your last name should be in
the mask box. This will leave you with the following scenario:
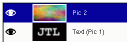
- Now add a new layer and name the layer Background. Fill the
new layer with some color (e.g. with the help of the bucket fill tool)
and use Raise Layer or Lower Layer from the layer dialog menu to achieve
something like this:

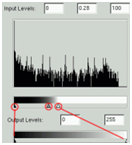
- Now you'll see that the image of the text isn't very sharp.
We'll change this now. Make sure you have selected the plasma layer's
mask (click the box that contain your last name) and do Colors →
Levels. This tool is one of the most important tools you have! Play with
the little triangles you'll see in the two grey gradients and watch
their effect on the image. For now, try to achieve something like the
following:
- Duplicate the Plasma layer and name the new layer Shadow. Then
right click the Shadow layer, use Apply Layer Mask and then Lower the
layer by one. After this step, you should have something like this:
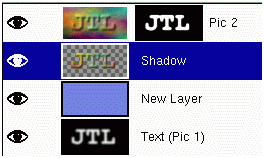
- Make all layers invisible, except the Shadow layer.
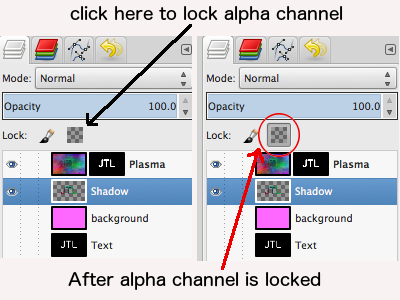
- Activate the Shadow layer and make sure you click the lock alpha channel
button. Then fill the Shadow layer with black (You can paint over the
text with a paint tool or simply drag a black color from the color
selector and drop it over the image). You do not have to be careful: the
Keep Transparency button will let you paint only on opaque parts of the
image. This will give you:
- Again make all layers invisible, except the Shadow layer.
- Now for the Shadow layer, unlock the alpha channel by clicking on the
lock alpha channel button (see the image above). Then move the layer some pixels to the
right and downwards. You can move it this way: Layer -->Transform -->Offset and enter a
small offset for both X and Y (such as 25). This will offset the contents of the
layer without moving the layer itself.
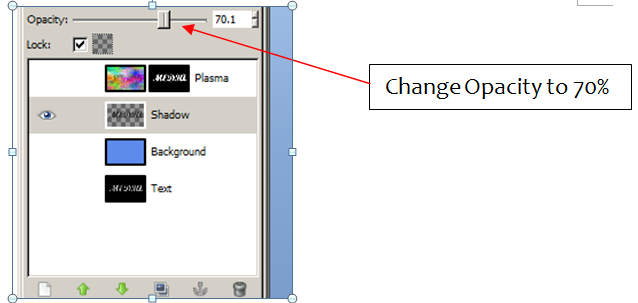
- Then Filter -->blur-->Gaussian blur
to blur your layer by 5.5 for both X and Y. Adjust the Opacitiy for the Shadow layer
to 70% so the background will shine through. Now you've just generated a so-called
drop shadow, which greatly enhances the 3D effect and is used in very
many places.
- Duplicate the Plasma layer twice and name the new layers aaa and bbb, respectively.
- Duplicate the Shadow layer once and name the new layer ccc. Now your layers should be like this:
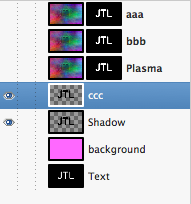
- Make all layers invisible, except the layers aaa and Shadow.
- Right click the aaa layer -->Merge Visible Layers.
- Make all layers invisible, except the layers Background, bbb and ccc.
- Right click the ccc layer -->Merge Visible Layers.
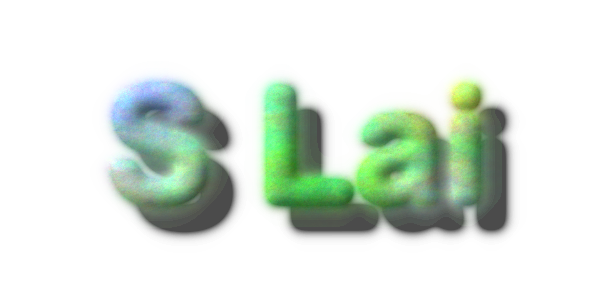
- Make all layers invisible, except the Plasma layer and make
sure Plasma layer is activated. File-->Export -->Select File Type
-->PNG and save your file with a name YourID-Plasma.png to desktop.
- Make all layers invisible, except the Shadow layer and make
sure Shadow layer is activated. File--> Export -->Select File Type
-->PNG and save your file with a name YourID-Shadow.png to desktop.
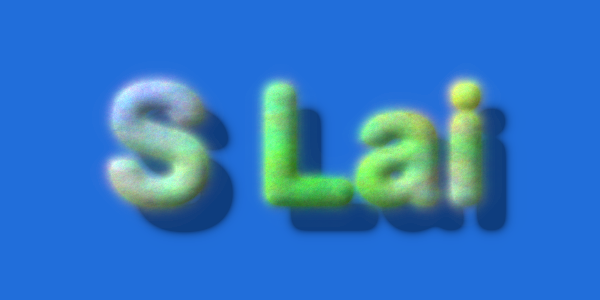
- Make all layers invisible, except the Background layer and make
sure Background layer is activated. File-->Export -->Select File
Type -->PNG and save your file with a name YourID- Background.png to
desktop.
- Upload and post the three images to your D2L.
- Good job! You have finished the lab. Please wait for your instructor to grade your work.
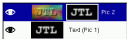
Example results
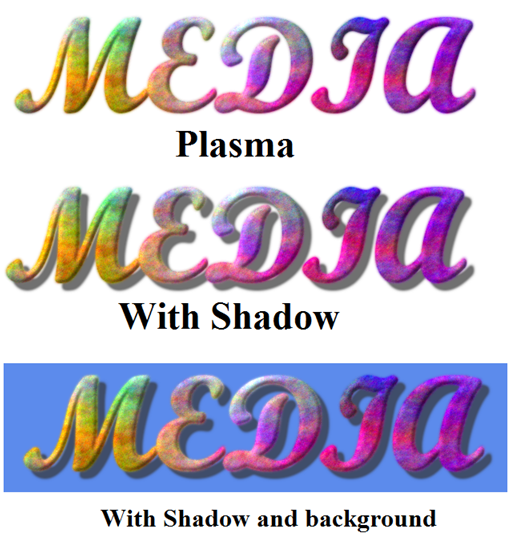
Plasma:
With Shadow:
With Shadow and Background:
Back to Dr. Lai's course homepage.