Lab for Image Retouching
Module: Editing Bitmapped Images
Overview
This is a hands-on activity. The purpose of this activity is to apply various effects to parts of an image.
Learning Outcomes
Students will be able to:
- Import an image.
- Prep/select the image for editing.
- Apply blurring effect.
- Apply desaturation effect.
- Add a border and a signature.
- Know how to copy and paste selections of image.
- Save the intermediate results of an image.
Detailed Description
- Tasks: Importing image into GIMP
- Launch GIMP.
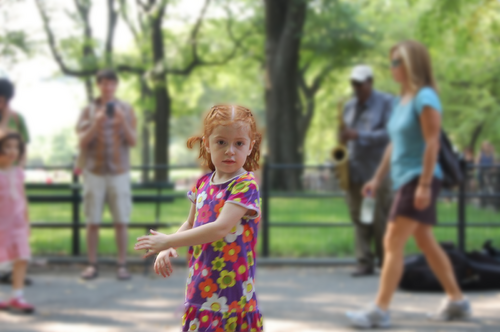
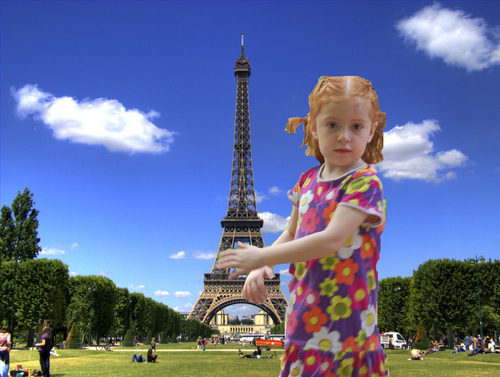
- Open an image that has you in it using GIMP. Here I use the following image as an example.

- Tasks: Prepping the image
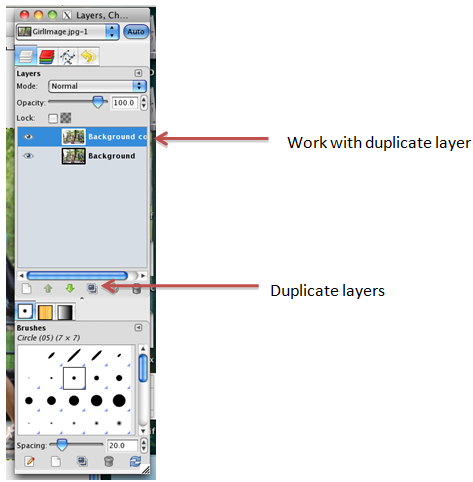
- 1. Click on the Duplicate Layer icon in the Layer Tool window on
the right side to make a copy of the image and name it Original_CP.
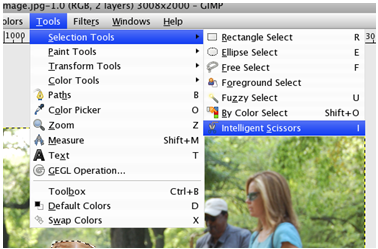
- 2. From the Tools drop down menu select Selection Tools and then Intelligent scissors.
- 3. Use these scissors to outline you (in the example case here,
it is the girl) by clicking on distinct points on the edge of the girl's image. The first point should be clicked on once more at the end to
close the loop.
- 4. Click Enter to confirm the selection.
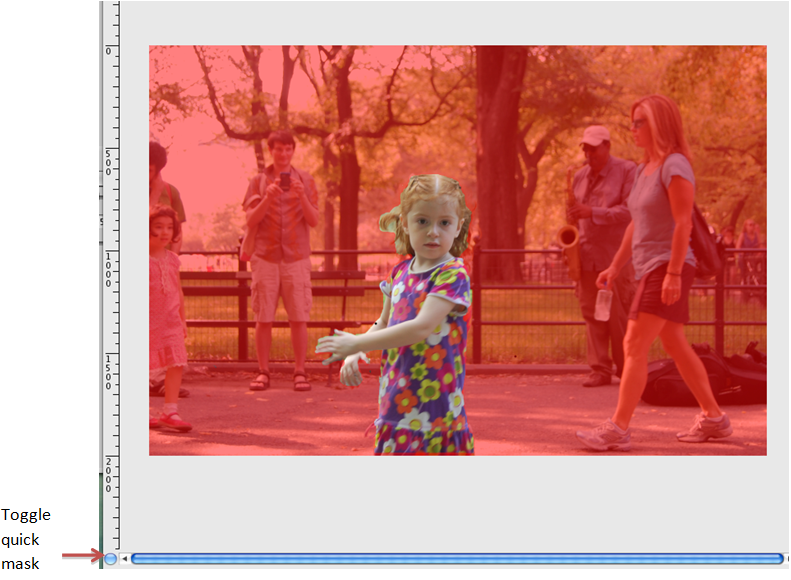
- 5. Click on the Toggle Quick Mask button on the left side of
the horizontal scrollbar. This should show you your selection and mask
everything else by a red color.
- 6. To finely tune your selection, click on the eraser in the Toolbox window on the left.
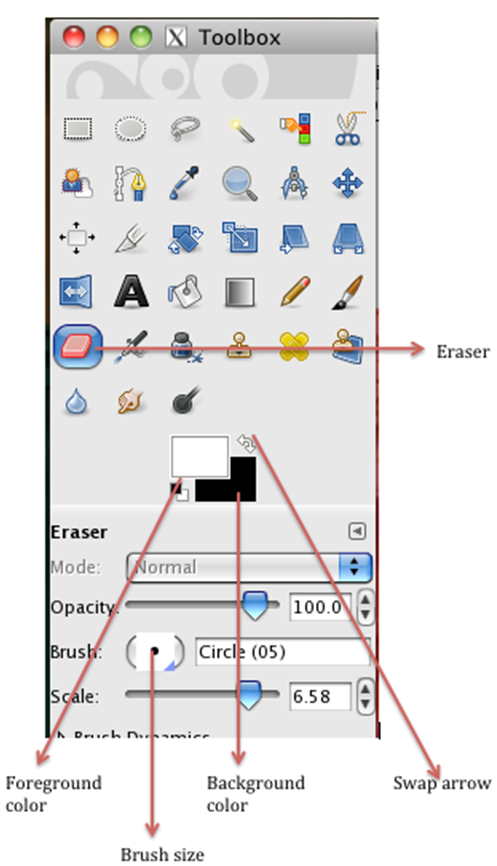
- 7. Select a size of the eraser.
- 8. With the image masked (girl in normal colors, everything else in red) use the eraser to refine your selection.
- If the Foreground color of the eraser is black, then using the
eraser on the red parts will erase the mask and that part becomes your
selection.
- If the Foreground color of the eraser is white this coats your
selection with red and masks your selection. This portion will not be a
part of your selection any more.
- You may want to work with the original image size (100%) to get the details correct.
- 9. Click on the Toggle Quick Mask button when you are done.
- 10. Copy the selection (Edit-->Copy), then do this:
File-->Create-->From Clipboard to keep a copy of what you
selected. Then go back to your previous Gimp window
- 11. Click on the Select drop down menu and select Invert. This
will invert your selection (Girl is deselected, everything else is
selected).
- 12. Click on the Toggle Quick Mask button to verify that your
selection has been inverted. If everything is fine, click on the Toggle
Quick Mask button again to remove the red color
- 13. Duplicate the layer Original_CP (which has the selection on
it) and rename the duplicated layer as "Blur" by double clicking on its
name.
- 14. Pull the Filters drop down menu and select Blur ->
Gaussian Blur options. Play with different horizontal blur values to see
their effect on your image. The vertical blur will be changed
automatically.
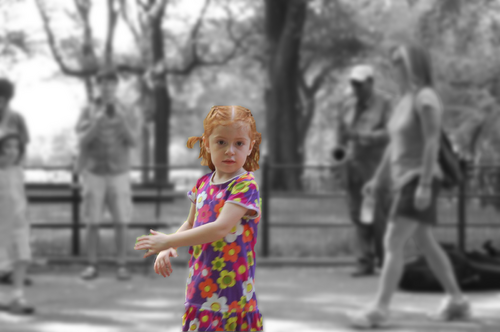
- 15. Choose a proper value of blurring, so that you (in this case the girl) is prominently visible
but the background is clearly blurred.
- Tasks: Black and white background
- 16. Duplicate the layer Original_CP (which has the selection on it) again. Rename the duplicated layer as BW.
- 17. Make sure you are working on the BW layer and make sure BW layer is visible.
Pull the Colors drop down menu and select "Desaturate" (remove colors).
- 18. You can pick a shade of gray based on either lightness, luminosity or average.
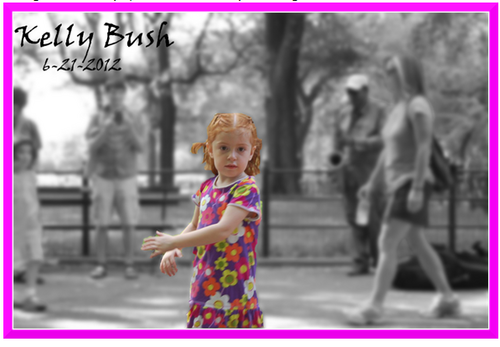
- Tasks: Add border and signature
- 19. Duplicate the layer BW (which also has the selection on it), and rename the duplicated layer as Signed
- 20. Pull the Filters drop down menu and select Decor->Add
border. The border should be pink in color and its X and Y size should
be 15.
- 21. Select the "Text Tool" from the Toolbox on the left side
and double-click on the image where you want to add your signature.
- 22. In the dialog box that opens up type your name and today's
date. Change the font of your signature so that it looks like real
signature.
- 23. Change the font style, size and color to your liking.
- 24. Make only the following three layers visible: the border layer, the signature layer and the layer named Signed.
- 25. Right click on the Signed layer and choose "Merge Visible Layers ..."
- Tasks: Compose new images
- 26. Open a new image (your own choice of any appropriate image)
using "File --> Open as new layers" and name the layer Composed.
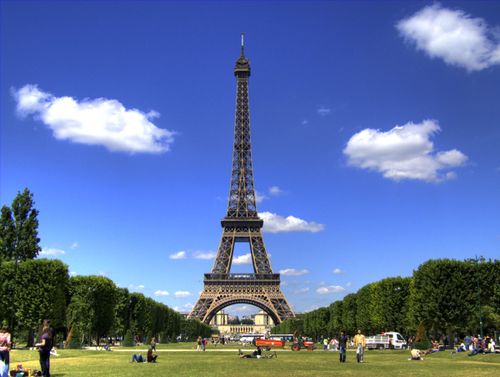
- 27. Copy the selection of yourself (in this case, it is the
girl) from the Gimp window you created from Step 10 and paste it to the
layer Composed to get a new image. To get the best result, you may need to move, scale or
rotate your subject. Once everything is in place, you need to anchor the pasted floating layer.
- Tasks: Saving image editing progressions
- 28. On the Layers window on right, Select the layer Original_CP and save the file as YourID-OriginalImage.png (5 points)
- 29. Select the Blur layer and save it as YourID-BlurImage.png (20 points)
- 30. Select the BW layer and save it as BWImage.png (20 points)
- 31. Select the Signed layer and save it as SignedImage.png (20 points)
- 32. Select the Composed layer and save it as ComposedImage.png (20 points)
- 33. Save the entire file as an editable GIMP project file (File -> Save As -> GirlImageFilters.xcf ) (5 points)
- 34. Post all the created five (5) PNG files plus the image you used to compose
(totally 6 images) to your website (10 points)
- 35. Wait for your instructor to grade your work.
Examples
Click here to see an example done by a GGC student.
Click here to go back to Dr. Lai's page


